muslin progress
My Anchors Away muslin is coming right along.
The dress and yoke are all ready to be joined together tomorrow evening. The yoke was really fun to make and I learned a lot about the process for my next iteration with the cotton/linen fabric. I feel confident and happy that I have taken the time to work with the muslin process to make something I really like in the end.
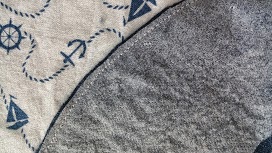
I decided to fully line the yoke, so I cut plain white muslin for the lining and cut the facing pattern from interfacing to fuse to the white lining. I also used interfacing on the navy blue linen collar and graded the seams. I read a tutorial on curves for scallops, which inspired me to cut the seam allowance very tight instead of notching. I graded the seam with the interfacing so it wasn't too thick.
 I was very pleased with this method for consistency in the curve of the collar when I was finished. It produced better results than the collar on the yellow muslin I made using the trusty clipping and notching method I always have. To finish off the collar, I also decided to top stitch in contrasting white, for a little extra detail.


As I was pressing the hems for the sleeves, I had an idea that I tested for the side seams... couldn't get enough pinking today, so I thought I would pink the seam allowance on the side seams. I quite like the result.
 I find this a very happy medium between french seams, serging, and just leaving raw edges. I don't own a serger, but I used one often when I worked for the theatre department making costumes in college. It definitely comes in handy and I have thought about getting one for sewing knits before. I do not, however, like the look of serging as a finish in home sewing. It is just a quirk for me, but I don't care for it. The pinking, I really like, though. It reminds me of many home-sewn vintage pieces I used to wear. I think I will be pinking more in the future.
Another change, besides fully lining the yoke, was that I decided to sew the button holes and buttons on before attaching it to the rest of the dress, as the pattern suggests. It seemed easier to do when you didn't have a whole dress floating around you and I thought it would be good to have the buttons safely buttoned in place first, so I knew they were positioned just as I wanted them. So, I set out to mark the button holes.
 I was planning to use very simple blue shank buttons that would match and be rather understated. I picked these at Walmart when I got the fabric Friday night. I like them because they have a vintage feel and they are quiet. I am trying not to make every piece showy or too costumy, to follow my "just because you can, doesn't mean you should" mantra. All seemed to be going well. I haven't made button holes in ages, so I practiced a couple on scrap fabric before attacking the yoke. Once I took to the yoke, all seemed to go smoothly enough.

 But I was overly-cautious about the size and there wasn't enough ease for the blue buttons to pass through. Oops. What to do? I think I subconsiously made this mistake so I could eschew my pratical buttons for something more whimsical. I alreay knew just the ones that would fit.
 The bigger size of the heart button is what I ended up using. I bought an assorted pack of these for the little ones - to put on dolly dresses. I had a few of the larger size left and I wanted just a touch of red to set off my nautical theme. These also remind me of some buttons on a flannel jumper that my mom made me when I was a very small child and I loved that dress to bits. So, whimsy won out on this muslin and I decided to use the practical blue ones on my next project, instead of red Czech glass vintage buttons.
 Tomorrow evening, I will put it all together. At the moment, I am off to bed to read up on this great series I discovered on coletterie called Wardrobe Architect, all about designing your own wardrobe. This is something I have been thinking about a great deal lately & one reason that I have been inspired to practice sewing for myself again. I look forward to learning and sharing more about this in future posts. Bon soir! <3
The dress and yoke are all ready to be joined together tomorrow evening. The yoke was really fun to make and I learned a lot about the process for my next iteration with the cotton/linen fabric. I feel confident and happy that I have taken the time to work with the muslin process to make something I really like in the end.
I decided to fully line the yoke, so I cut plain white muslin for the lining and cut the facing pattern from interfacing to fuse to the white lining. I also used interfacing on the navy blue linen collar and graded the seams. I read a tutorial on curves for scallops, which inspired me to cut the seam allowance very tight instead of notching. I graded the seam with the interfacing so it wasn't too thick.
The lining worked well and I pinked the edges so they wouldn't fray. I found these vintage pinking shears at a thrift store in Grants Pass on a trip to visit my father-in-law. They are dreamy! They cut through multiple layers of fabric like butter and make a cute and utilitarian finished edge that I much prefer to the look of serging.
While we are on the subject of wonderful vintage sewing tools, I've wanted to take a moment to praise these hams, which make pressing hard-to-reach places much easier. Once upon a time, I had a little sleeve board, but that was many moves ago... perhaps I will replace it - but in the meantime, these are great. My mother-in-law gave them to me from her sewing things before she passed away. They are wool-covered and they have a little tag that says "Made in Portland, Ore." It always makes me happy to use things that she gave me. I think it would make her happy too, to know that they are getting used.
Here is the big ham in action to press the sleeve hem. It also came in handy for pressing the underarm as it attached to the bodice/skirt pieces.
Another change, besides fully lining the yoke, was that I decided to sew the button holes and buttons on before attaching it to the rest of the dress, as the pattern suggests. It seemed easier to do when you didn't have a whole dress floating around you and I thought it would be good to have the buttons safely buttoned in place first, so I knew they were positioned just as I wanted them. So, I set out to mark the button holes.
I used my favorite trick to cut the button holes safely, by putting a straight pin in to stop the seam ripper. I learned that from my mother when I was a little girl and it's a clever little trick that is so simple and effective. It always makes me smile.
Comments
Post a Comment