learning a new skill - DIY bias tape.
I learned about Nani Iro fabric from The Craft Sessions this year and subsequently became intrigued by the idea of specially made bias tape for delicate seam binding on such beautiful fabric. A quick search of etsy yields tons of listings for homemade tape in multitudes of fabrics and prints. Pretty cool!
But this also got me thinking - if others could do this with their fabric scraps, why not just invest in the tools and try my hand at doing it with my own fabric scraps?! So I ordered a 12mm bias tape maker and decided to give it a try.
There are a number of ways to go about getting your bias strips ready. If you have a fairly large (11" or more) square of fabric, this is a clever method. Since I had a funky shape and I wanted to use up scrap fabric, I decided to go with a more traditional approach that maximized the shape I had.
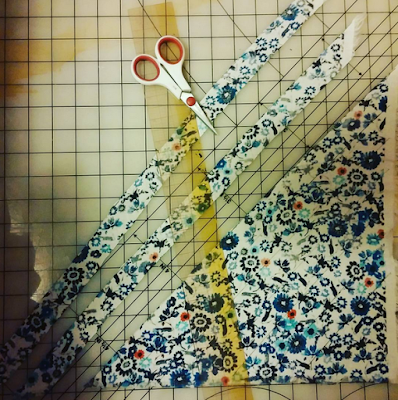
I took a corner scrap from my #2 Veronika circle skirt and trimmed it up to a 15" triangle, then cut 1 inch strips on the bias, stitched them together, and trimmed the excess.
I ended up with about 2.5 yards of tape from this little 15" triangle and only a couple slivers of wasted fabric.
Then it was time to pull out the iron & use my new tool. I ordered a Dritz 1/2 inch bias tape maker from amazon, which is actually a Prym 12mm one. Weirdly, if you order a Prym with Prym packaging, it is considerably more expensive. I have subsequently read that Clover bias tape makers are better & I think I will try them for other sizes.
I wanted to make 1/2" single fold bias tape for finishing seams. I would also eventually like to invest in a 1" size to make 1/2" double fold tape.
I cut 1 inch strips for my tape and I don't know how the math/magick works out, but I think to make better 1/2" single fold it would be better to add another 1/8" to the strip - strangely some width is lost in the fold and I think my tape would have been better starting with ever-so-slightly wider strips.
I didn't starch the strips at any time through the process, which also might have made it fold and press more easily, but I often find prefabricated bias tape a bit crunchy, so I was wondering how it would turn out sans starch.
Depending on the fabric, it could be a boon to temporarily stiffen up the strips for pressing, so I might invest in some spray starch. As you can see - the crease in the finished product isn't very crisp, but it's still clear enough that I could use it to finish and edge quite nicely.
I am excited to use this tape in an upcoming project and continue to experiment with perfecting my bias tape productions skills. I love the sustainability of using fabric scraps and the customization, uniqueness, and improved fabric quality options that come with making your own.


Comments
Post a Comment